Adding a column to SharePoint news articles (design/edit view)
The ‘News site’ site template of MOSS 2007 is probably one of the most used templates for companies which use SharePoint for their internal intranet. It allows you to add news items to a specifically designed site in a user friendly way. Editing the news items is done on the page itself, with extra functions for checking in/out pages, publishing concept and final versions and much more.
One of the questions many people asked me is: “Is it possible to add extra columns to the default news site?”. Offcourse it is! Just go to the article pages document library and add a new column. Unfortunately there’s one little problem with that approach: your newly added column won’t show on the ‘edit page’ but only on the document properties page. That’s not cool, since your users would have to switch back and forth between the ‘edit page’ layout and the document properties to fill in all columns. You would much rather add the column to the ‘edit page’ layout and perhaps show it on the article too, right?
With a little more work, that’s possible too! I’ll take you through the steps once more 🙂
First, we have to create a new site content type to house our new article type. Navigate to the site content types library by entering the site settings in the root of your site collection.
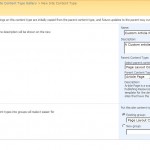
Choose to inherit your new Content type from the existing ‘Article Page’ content type to copy all of the existing article columns to your new content type. Give it a sensible name and save the content type.
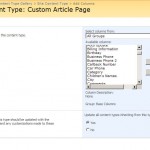
Now you can add the new columns to your newly created content type. Click the content type and choose between adding an existing or a new site column. I chose the already existing ‘categories’ site column, but your free to choose any column you want. Just make sure you remember the column type, since you’ll probably want to use the right kind of control to edit that column later on.
Once your new content type is set up the way you want it to, it’s time to add it to the document library in the news site. That’s done by opening the settings of the library and choosing the ‘Add from existing site content types’ option. After adding the content type, it will become available in the ‘New’ option dropdown list of your document library.
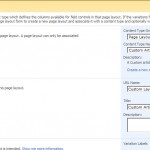
The final step is creating a page layout which contains a control to edit your extra columns. Navigate to the site settings once more and click on the ‘Master pages and page layouts’ option. Here you’ll find the already existing default page layouts like ‘ArticleLeft.aspx’. Add a new item by choosing ‘New’, ‘Page Layout’. Name your new layout and as a content type, choose your own custom content type.
The new layout page will be added as a clean, empty layout page. To edit it, use SharePoint designer via the ‘Edit in Microsoft SharePoint Designer’ options. You can open one of the default article page layouts in order to copy the contents for a good start. I’ve made a really simple alteration for this example, but you can edit the page layout in any way you want.
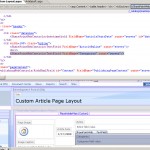
Once the layout is opened in SharePoint Designer, find the spot where you want the new column to be edited/shown and add the correct control to edit it. There are multiple controls available in the SharePointWebControls collection as well as the ‘PublishingWebControls’ which you can both use, view the existing layouts for good examples.
In the screenshot; notice how I copied the existing control which displays/edits the ArticleByLine field. You have to set the ‘FieldName’ property to the correct column name. Make sure you’ve got the correct column name; the name shown is not always the same as the internal column name (it could be translated for instance). A good trick to get the correct colum name is adding a new article and opening that aspx file in SharePoint Designer; that will display an XML structure containing all of the columns.
Now save the layout and you’re done! In display mode, the contents of your column will be shown on the page and in edit mode the control will transform to edit mode to allow the user editing the page to edit the contents of the column. Now your user is able to alter the columns contents in the page edit view, without having to go to the extended document properties!

Leave a Comment