[Azure] Setting up continuous integration for (existing) Azure Functions
I a previous blog I showed how you might replace your existing Azure WebJobs with Azure Functions. If you’re creating these functions as part of a project, you’re bound to have some sort of source control solution in place and you might want to leverage the possibility to automatically deploy your code (aka continuous integration). Luckily Azure Functions supports this, I’ll detail how to set it up in this blog.
For my set-up, I’m using the submerged repo hosted on GitHub. I’m using an existing project along with existing functions. Normally, you’ll edit the code for these functions via the Azure portal as you might have seen in my previous article. Moving this over to GitHub, I wanted to just take what I already had and basically only change the location it’s stored.
Step 1: download the files you already have
First step is to download the files you already have and store them in a folder on disk. This folder needs to have the exact same name as your function has. So if you have multiple functions, you’ll get multiple folders. If you’ve got a few functions, you probably don’t want to go about copy/pasting all of the content file by file. So I used FTP to connect to the wwwroot folder of my functions instance and download the sourcefiles from there.
To do so, head over to the Azure portal, open up your functions instance and go to the App Service Settings (found under “Function app settings”). Here you’ll find the “Get Publishin Profile” button. That will give you an XML file to download which contains the FTP host, username and password you should use to connect.

Next, use your favorite FTP client (mine is FileZilla) and download the contents of your functions to disk:
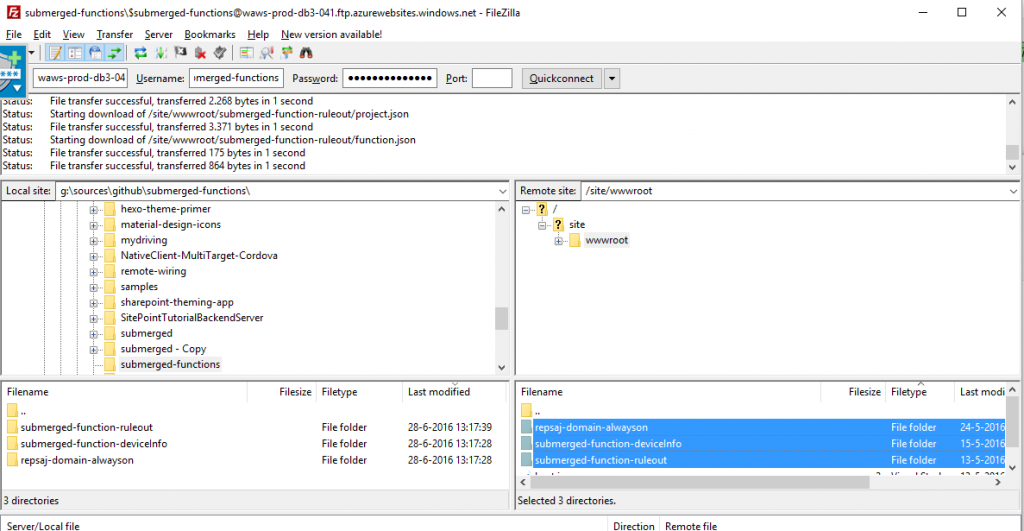
In the above example you can see how I downloaded three folders, for three seperate functions. Each function will have:
- A run.csx file containing the function code.
- A function.json file containing the function bindings in JSON format.
- An optional project.json file which might contain information about NuGet packages.
There might be other optional files (I found .md files in there of which I have no clue where they come from). NodeJS functions might also use other files, haven’t tried those yet.
Step 2: create a new branch in github
These folders you’ve now got need to be in the root of your github branch. I didn’t want to mess up my normal source branch so I decided to create a new branch for just the function code. To do so, follow these actions:
- Create a new folder on disk
- Clone your repository into this new folder, you should replace the URL of course.
git clone http://github.com/jsiegmund/submerged .
- Now checkout a new orphaned branch. I called it “functions”
git checkout --orphan functions - Remove all of the existing files from the folder:
git rm -rf . - Now copy in the folders you got from step 1. You can now add & commit those to your repository. I always use the Windows GUI client to do this:
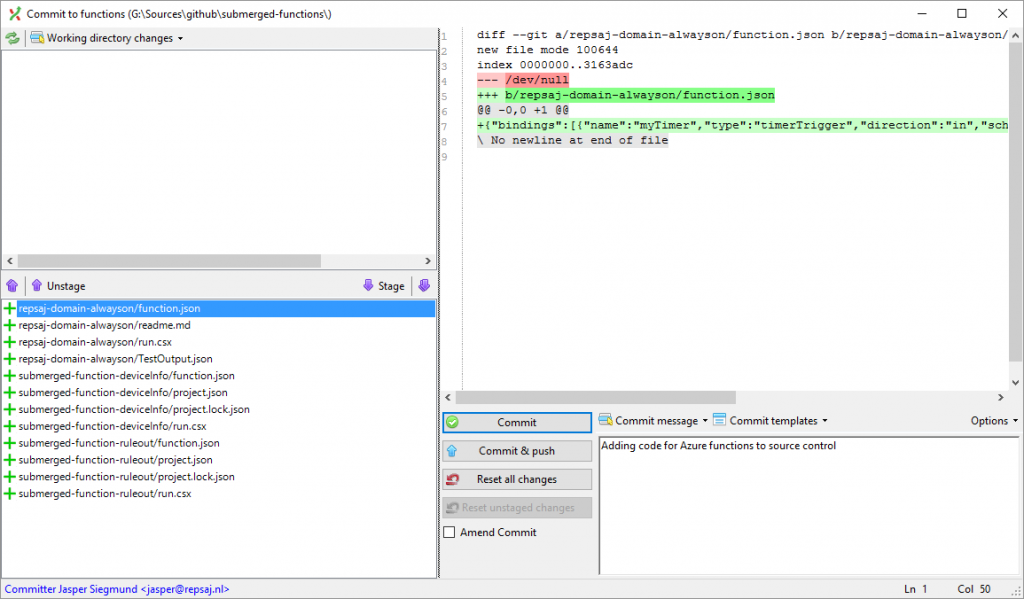
You now have your Functions source code safely stored in a branch in your github repo.
Step 3: Configure Functions instance for CI
The last thing to do is to set-up your functions instance to get it’s code from github. Head over to the Azure portal and open the “Function app settings” page. Here you’ll find the button labeled “Configure Continuous Integration”. This button opens up a wizard which helps you configure a connection to your github (or other source control provider) repository.
I haven’t made screenshots of the entire experience as it’s pretty self-explanatory in my opinion. The end result is this:

So you see how I’ve configured GitHub as the source, my account, my organisation (personal account), project and finally the functions branch we’ve created above. You can now save this source and start syncing the code from it:

As seen in the screenshot, each sync details the commit description and time.
Continuous integration
Now that you’ve got your code linked to this Functions instance, magic starts happening. Each push you make will automatically update the code for your functions, the functions runtime will monitor github pushes (using webhooks I expect) and immediately reflect that in the code.
This also means the new folders you create will be translated into new functions. To test this, you can simply take one of your existing folders, copy / paste and give it a new name. Once you’ve pushed that new folder into your github repo, simply reload the functions dashboard and a new function will automagically appear. Super simple!
This also means that you can now set-up test / QA / Production instances of you functions linked to specific branches. Updating them is as simple as pushing the code to the correct branch.
One final remark
There’s one downside to this approach. When you now open your function in the portal, it will display the following banner:

This means that you cannot use the browser any more to see whether your code actually compiles. Desktop tools like VS Code do not provide any intellisense or build options to use with these .csx files. At least, not yet. I still have to install VS 2015 Update 3, when I find a way I’ll update this post.

Leave a Comment