[IoT] Aquarium monitor; Sending commands back to your hardware
Let’s start with some awesome news first! All of the sources for this project are now live on GitHub! Which doesn’t mean I’m close to being finished by the way, but it does allow you to take a look and maybe even contribute should you want to. This includes all of the code from the previous blog posts as well, so go over and take a look:
http://github.com/jsiegmund/submerged
Allright, so let’s get down to what this post is all about: sending commands back to your hardware.
IoT Hub
As we saw in part three, the Azure IoT hub is the central place for communicating with your devices. This doesn’t limit to data being sent from the device to the cloud, but also includes messages from the cloud to the device. Appropriately named, the two message types are:
- Cloud to device
- Device to cloud
Nice and simple, right? So let’s start sending and receiving some commands.
Setting up the receiver
The receiver in our scheme will be the Raspberry Pi running Windows 10. Sending and receiving messages from the cloud is it’s task being a gateway device. The code is actually quite simple:
private async void ReceiveC2dAsync()
{
    while (true)
    {
        Message receivedMessage = null;

        try
        {
            receivedMessage = await _deviceClient.ReceiveAsync();
        }
        catch (Exception ex)
        {
            // when something happens in the transport; reboot the client
            _deviceClient = DeviceClient.CreateFromConnectionString(_deviceConnectionString);
        }

        if (receivedMessage == null) continue;

        DeserializableCommand command = new DeserializableCommand(receivedMessage);
        await CommandReceived(command);
        await _deviceClient.CompleteAsync(receivedMessage);
    }
}
As you see this already includes some plubming and error handling. I found that sometimes the ReceiveAsync call will fail (I have yet to find out why), so I’ve added some try/catch logic to deal with that.
The ReceiveAsync call will not complete until the device actually receives a message, so you will probably want to run this in a seperate thread. As soon as the device receives a message, I translate that into a DeserializableCommand, which looks like this:
public class DeserializableCommand
{
    private readonly dynamic _command;

    public string CommandName
    {
        get { return _command.Name; }
    }

    public dynamic Command
    {
        get { return _command; }
    }

    public DeserializableCommand(Message message)
    {
        if (message == null)
        {
            throw new ArgumentNullException("message");
        }

        byte[] messageBytes = message.GetBytes(); // this needs to be saved if needed later, because it can only be read once from the original Message
        string jsonObject = Encoding.ASCII.GetString(messageBytes);
        _command = JsonConvert.DeserializeObject<dynamic>(jsonObject);
    }
}
Nice and simple, right? The message is converted to a json string and then deserialized into the object it represents. The json command coming over the line should have a name, and the rest of the command depends on which command is being sent.
That’s all there is to it on the receiving end. Of course you need some code handling the command you’re receiving, but that depends on your implementation. The Commands directory in the submerged source code will show you how I’ve done it.
Setting up the sender
The sender is doing equal things as you might have expected. A similar Command object is constructed, translated into json and then converted into the bytes that will be sent across the wire.
/// <summary>
/// Sends a fire and forget command to the device
/// </summary>
/// <param name="deviceId"></param>
/// <param name="command"></param>
/// <returns></returns>
public async Task SendCommand(string deviceId, dynamic command)
{
    ServiceClient serviceClient = ServiceClient.CreateFromConnectionString(_iotHubConnectionString);

    byte[] commandAsBytes = Encoding.UTF8.GetBytes(JsonConvert.SerializeObject(command));
    var notificationMessage = new Message(commandAsBytes);

    notificationMessage.Ack = DeliveryAcknowledgement.Full;
    notificationMessage.MessageId = command.MessageId;

    await AzureRetryHelper.OperationWithBasicRetryAsync(async () =>
        await serviceClient.SendAsync(deviceId, notificationMessage));

    await serviceClient.CloseAsync();
}
The serviceClient.Async part is where the magic happens. There’s some retry logic in place should things fail for whatever reason. Also notice how the message will request for delivery acknowledgement so that you know the message was received. The client will also make sure the command was successfully processed before returning the acknowlegdement, so you will know whether things succeeded or not.
Implementing commands
So the above is all you need to get communications going. The next part of course is to make sure these communications are meaningful and actually do something. In my case, I’ve got two types of commands set-up right now:
- Configuration updates: whenever I change something that the gateway needs to know, I send an updated configuration to the device. Doing this will update the device in near real-time so that I do not have to reboot the app or something like that.
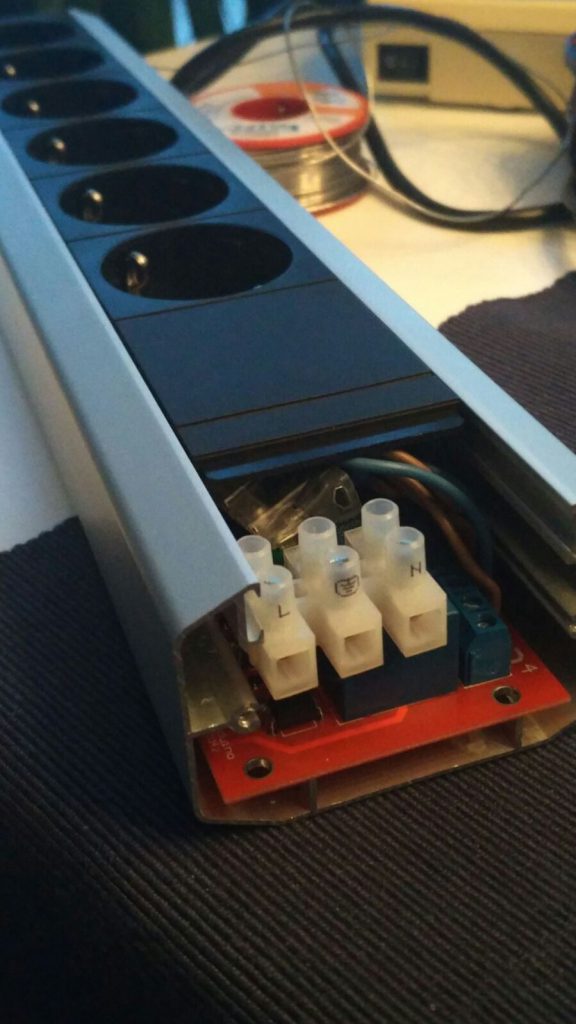
- Relay switches. I’ve modified an outlet strip to include a 4 channel relay board. This allows me to switch 4 of the 6 relays using another Arduino. So when a relay switch command is received, it’s transmitted to the Arduino which will carry out the command as a true soldier. This allows me to turn off/on my filter, heating and lights.
For anyone interested in the schematics and other hardware, I plan on making a used hardware list real soon!


Leave a Comment